Many vehicles are equipped with built-in buttons that can be
programmed to operate your garage door (assuming you have a compatible garage
door opener). The most common system is
HomeLink. There is another called Car2U (aka Universal Remote System depending on your vehicle’s owner’s manual ) that is no
longer in new vehicles but was common. I strongly
recommend using them for security reasons.
Note: In order to
avoid confusion, when I say “opener” or “garage door opener”, I am referencing
the mechanism that lifts your door, specifically the motor, which is where the learn button is located. Please do not confuse “opener” with the
handheld/visor clip remote control.
Now that many vehicles come with a touchscreen display, once
you figure out which menu items to click on it will walk you through the
setup. Otherwise, you will find a set of
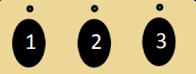
three buttons somewhere that you will need to program. They may be located on your review mirror, sun
visor, ceiling, steering wheel, or dash, there is no standard placement.
If you see this icon, you are dealing with the HomeLink system. There may also be a single light above the buttons.
If there is a small LED light above each button, you are working with Car2U.
Vehicle Remote Compatibility
Both systems are compatible with most LiftMaster, Chamberlain, Craftsman, Genie, Linear, Marantec, and Overhead Door brand garage door openers installed since the mid 1990’s.
One common garage door opener model that does not work with any built-in vehicle remotes is the Quantum by Wayne Dalton. If you have one of these, consider replacing it as it’s one of the worst garage door openers ever made.
The most common compatibility issue comes up when trying to pair a vehicle with the older versions of HomeLink to newer LiftMaster/Chamberlain/Craftsman openers manufactured since 2011. (which can be identified by the yellow antenna wire). This situation requires a HomeLink Compatibility Bridge.
The HomeLink website allows you to check compatibility between all equipped vehicles and garage door opener brands. Car2U no longer exists and neither does the website.
Things to Know Before You Start
For vehicles with HomeLink you will need a working remote control in order to “feed” the code into the vehicle. Car2U does not require a remote, but it is helpful to have one handy in case you accidentally close the door before the vehicle setup is complete.
Pull your vehicle out of the garage, and leave it parked within range. Make sure there is nothing obstructing the door if it were to close.
Locate the learn button on the garage door opener motor but don’t touch it yet. You will probably need a ladder, the exception being newer LiftMaster/Chamberlain/Craftsman openers with the learn button on the wall control. Follow proper ladder safety protocols.
When it comes time to put the opener in learn mode DO NOT HOLD THE LEARN BUTTON DOWN! This is the number one way to turn a simple task into a nightmare. If you hold it down too long (about seven seconds) you will clear the memory on your garage door opener’s circuit board, which will un-program all of your remotes, keypads, and vehicles. The exception to this is newer Genie and Overhead Door openers which do require a BRIEF press and hold, the instructions are here.
Think ahead about which buttons you are programming to which door. Some of the actions involved are time sensitive so have a plan, you will need to execute in about 30 seconds after putting your opener in learn mode.
Try to do any remote control, vehicle, or keypad programming at a time when it is unlikely that a nearby neighbor will click their remote. If a neighbor tries to open their garage while you have your opener in learn mode, they could accidentally grab your code and take control of your door.
Be aware that if you are working with HomeLink and you want to program a button that has already been in use, you will need to clear all existing programming, which may be a problem (for example if your gate or another house is programmed to the vehicle). There is no way to clear one button at a time. Car2U buttons can be cleared and reprogrammed individually.
Most vehicles with HomeLink systems have an indicator light that will turn on when you press the button(s). It could be any number of different colors, and some of them change colors. On a few vehicles, instead of a little light, either the house icon or a message appears on the dash, display, or rearview mirror. The important thing to pay attention to is whether it is solid vs blinking fast vs blinking slowly (by slow I mean one second intervals).
Programming HomeLink
Once you are ready, follow these steps. Remember, there are some superficial
differences between vehicle brands, but you will be following the basic logic of
starting with an already programmed handheld remote, then feeding that code
into the vehicle, then learning the vehicle to the garage door opener.
MOST vehicles require that the key is in the ignition and the accessories are turned on in
order to program. MOST will not program if the engine is running.
For first time programming, or if you need to reprogram a button that was already in use:
- Press and hold the two outside buttons. The indicator will turn on steady. Continue holding until it starts to blink quickly, usually 20-30 seconds. This clears out any existing codes and puts it in the mode to be programmed.
- Decide which HomeLink button you want to program. Locate the button on your handheld remote that controls the door you are trying to pair with the vehicle.
- Press and hold the HomeLink button. The indicator should start to blink slowly. While continuing to press and hold, now position the remote control next to it and press and hold the button that operates your garage door. It will take anywhere from a few seconds to half a minute, just keep holding. When the indicator flashes quickly, you have successfully fed the code from the remote into the vehicle. If it doesn’t work the first time, start over at step one, sometimes it takes a couple tries. While rare, it is not unheard of for the vehicle buttons to be faulty.
- Now go to the learn button (also called “program” or “actuate” on some models) on the side or bottom of your garage door opener’s motor. Press and release the learn button, then return to the vehicle and slowly press the HomeLink button a few times. When the door starts moving you are done. Linear brand openers may not require this step, if the vehicle button works after step 3 you are done.
- If you are going to program additional vehicle buttons, skip step 1 or you will erase all the work you just did.
If you try it a couple times and it doesn’t work, you may be dealing with one of the quirky vehicles out there that doesn’t program in the standard way (for example on some German automobiles you have to hold the remote by the driver’s side headlight…don’t ask I have no idea why). You may have to consult the owner’s manual.
Here’s a helpful video:
Programming Car2U
The Car2U system is programmed without using a handheld remote. Instead it pairs directly to the garage door opener using these steps.
- Press and hold the two outer Car2U buttons for two seconds and release.
- Locate the learn button on your garage door opener. Put the opener in learn mode by pressing and releasing the learn button. For newer Genie and Overhead door models follow these instructions.
- Go to the vehicle. Press and hold the Car2U button you wish to program and release as soon as the door starts moving. It could take anywhere from one second to nearly a minute. The light above the button will blink as it finishes pairing.
- If your door operates when you press the Car2U button you are done.
This is the best instructional video I have found for Car2U. It is from a Ford dealership, but these instructions work for most vehicle brands and models.
If you have a really old remote control that use dip switches, follow these instructions:
If you can’t get it figured out, give us a call!
